
Spalted Teleaster - Part 4
- John
- Feb 8, 2019
- 2 min read

Once the neck joint is done, I can start really progressing the neck itself. First I cut the fret slots and the nut slot using my Dewalt Radial Arm Saw. It was built in Italy the early 90s and is a thing of beauty. The fret slots are exactly (and I mean exactly) 0.6mm wide, and there is no flex anywhere in the machine. These days woodworking machines are made in China and compete only on price and they are depressingly awful to own. Radial arm saws have a bit of a reputation for removing their owners' thumbs, hence the reminder to keep my hand on the smiley hand.

Once slotted the fretboard can be glued to the neck using as many clamps as I can find.....

I leave the neck clamped up over night then rout the fretboard flush with the maple neck itself. There was a little bit of tearout at the end of the neck as I was routing cross-grain. This is pretty common with ebony which is a very brittle wood. I mixed up some epoxy with some ebony sanding dust to fill the holes. They'll be invisible unless once the neck is finished. Hopefully....

Fretting is the next job. I'm using Sintoms brass fretwire which is a joy to work with. It's plenty hard enough, but easy to cut and file. I cut the fret wire to length and trim the tangs with my dremel.
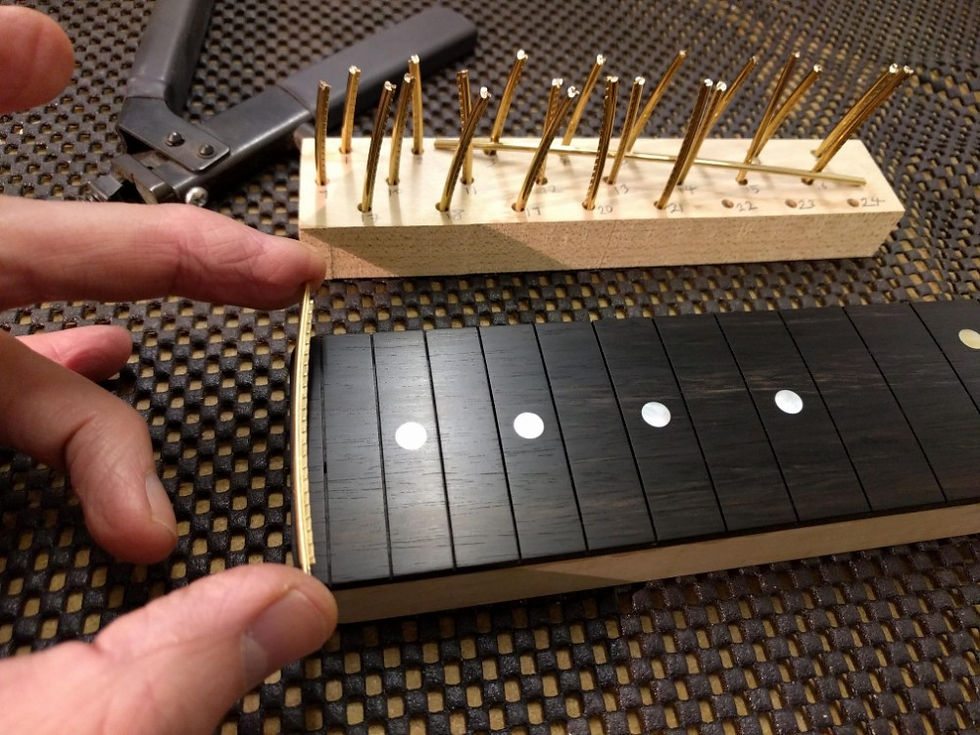
The frets get pressed in and are then filed to the correct width. The gold goes beautifully with the ebony!

I fill the gaps at the end of the frets with the same epoxy/sanding dust:

And the neck is now ready to start the process of carving. Next time.
Meanwhile I rout the control and pickup cavities:

This guitar will have an ivoroid binding that will match the creams in the spalted maple top. Once I've routed the channel it's time to glue it in. First, though, I have to cut lots, and lots, and lots of tape. You always end up having to cut more in a hurry half way through.....

I prebend the binding with hair dryer and leave in in place overnight so that conforms more or less to the shape of the guitar. I then glue it in using an acetone based glue which half melts the binding and glues is firmly in place. Binding isn't easy to do, but I think it looks great!

Beyond lots and lots of sanding, the body is more or less done, so I'll see you in the next post....


Comments